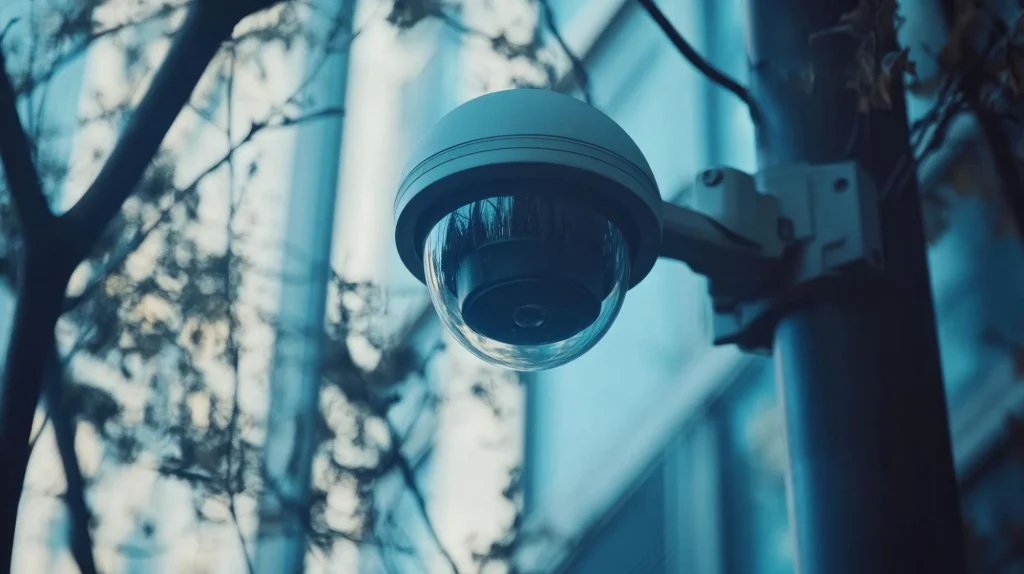
Installing a dome camera isn’t just about putting it on the ceiling and hoping for the best. It’s about getting the angle right, avoiding blind spots, and making sure the footage is valuable when you need it most.
If you’re a DIYer ready to take things up a notch, a technician aiming for faster, cleaner installs, or a business owner upgrading your system, this guide is for you.
We’ll walk you through how to install dome cameras like a pro, step by step, with practical tips that make a difference. We’ve gathered pro tips from expert YouTube influencers, CCTV dome camera technicians, and real-world installers, so you don’t mess up your walls, damage your ceiling tiles, or worse, watch your camera fall off hours after mounting.
Why do Dome cameras still dominate in 2026:
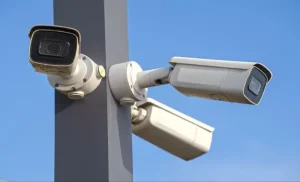
Before diving into installation, it helps to understand what dome cameras are and why they’re still a top choice in 2026. Compared to bullet or PTZ cameras, dome cameras offer the following advantages that make them ideal for indoor spaces, storefronts, offices, and even outdoor use when paired with the proper housing:
- The compact and discreet design enables it to be hidden, and intruders can’t tell where the camera is looking, so they can’t tell if they’re being watched.
- Dome cameras have rigid, vandal-resistant housings made up of polycarbonate. That makes it 20 times stronger than acrylic! The IK10 rating survives blunt force impacts up to 20 joules. That means it can withstand a 5 kg object dropped from 40 cm or withstand real-life abuse like a hard punch, a thrown rock, or even a strike from a metal tool without breaking.
- Cover vast areas from one spot, especially in rooms, lobbies, or hallways.
- Reduce gaps in surveillance with a lens angle that sees more in tight or indoor spaces.
- Handle indoor lighting better by reducing glare from lights and reflective surfaces.
- Protect the lens from dust and damage with a fully enclosed dome cover.
A good installation guide should not only show you how to mount the device but also help you pick the best dome camera for your space, avoid blind spots, and get the most out of your system. Installing a dome camera is easy if you know the pro tricks.
Which dome camera is best for you?
Choosing the right dome camera isn’t just about specifications; it’s about what works best for your space, your setup, and your goals. Here’s a quick breakdown to help you make the right call:
Wall mount or ceiling mount:
When a camera is mounted on a wall, it usually has a half-circle (180°) field of view in front of it. That’s because the wall blocks the rear half, so the camera can only “see” outward, left, and right like a spread fan.
A ceiling-mounted dome camera can often rotate and cover a full 360° area. This gives you complete coverage in all directions, which is perfect for open indoor spaces like retail stores or lobbies.
Indoor locations ideal for dome cameras:
In lobbies, hallways, and elevators, if you install cameras in the ceiling, you get wide panoramic views while blending seamlessly into the surrounding architecture.
In reception areas and retail aisles, centrally mounted ceiling cameras capture movement patterns and customer flow while remaining discreet.
If you’re looking for an indoor dome camera, the biggest mistake you can make is underestimating the area it needs to cover. In enclosed spaces like offices, hallways, or retail floors, a narrow field of view or low resolution can leave dangerous blind spots.
For example, a 2.8 mm lens offers a wide 106° field of view, perfect for covering entire rooms from a single corner. In contrast, a 6 mm lens narrows the view to just 45°, creating blind spots and missing side activity.
Outdoor camera installation spots:
For outdoor installation, look for weatherproof ratings (IP66/67), IR night vision, and durable housings to handle harsh conditions.
Soffit or eave mounting protects cameras from weather and UV exposure while providing effective coverage of entrances and building perimeters. Corner installations at 8–12 feet high enable clear monitoring of fence lines and parking areas.
IP vs analog (PoE vs Coaxial):
- IP (PoE): Best for new setups. One Ethernet cable powers and connects the camera. Clean, scalable, and easy to manage remotely.
- Analog (Coaxial): Works with older systems. Usually lower cost, but limited in features and harder to scale.
Wi-fi vs wired Dome cameras:
- Wi-Fi: Easier for DIY installs. Great for renters or small businesses, but make sure your signal is strong and stable.
- Wired: More reliable and secure, especially for long-term use. No worries about signal drop or interference.
Pro tip:
Choose cameras with Power over Ethernet (PoE) support for neater installations, reduced cabling, and centralized power, which is crucial in indoor environments where aesthetics and infrastructure planning matter.
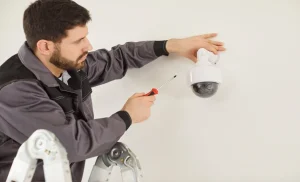
Step-by-step instructions on how to install a Dome camera like a professional:
Mounting a Dome camera isn’t hard, but doing it well takes a little planning. Whether you’re setting up one for your home or a complete system for your business, these pro-level tips will help you avoid common mistakes and get the best results.
Step #1: Smart camera placement planning:
What to do:
Identify the key areas you need to monitor before installing any cameras.
How to do it:
- Walk through your space and list the high-risk or high-traffic zones, such as entry points, cash registers, hallways, storage rooms, and parking lots.
- You need to identify the areas where a Ceiling vs wall mount will be suitable.
Ceiling Mount (Best for indoors):
Ideal for retail stores, offices, and lobbies where you want a wide, overhead view of the entire area. Works well for tracking movement across a space and avoiding obstructions like shelves or furniture. Indoors, ceiling mounts also reduce tampering risk.
Wall Mount (Best for outdoors):
Great for building exteriors, parking lots, and entry points where you need a focused, eye-level angle, such as capturing faces or license plates. Wall mounts are also easier to service outdoors and provide better protection from weather when installed under eaves or overhangs.
Use ceiling mounts for general coverage and wall mounts for targeted monitoring.
Best mounting height for dome cameras:
- Avoid mounting cameras where they’ll face direct sunlight or reflective surfaces like glass, which can distort the image.
- For best results, mount dome cameras 8 – 10 feet high, angled slightly downward. This gives you clear facial recognition without blind spots.
How to angle dome cameras for facial recognition:
Angle domes 15-30 degrees downward from 8-10 feet for frontal face capture at entry points, ensuring even lighting and no backlighting. Position natural walking paths in lobbies or gates, with 45-degree corner tilts to maximize identification zones. Pair with WDR for glare-heavy areas like dealership lots.
Vandal-resistant dome camera mounting options:
For vandal resistance, two things matter more than anything else: how hard the camera is to hit, and how hard it is to remove.
Strong hardware comes first. IK10-rated dome cameras, reinforced aluminum mounts, tamper-proof screws, and enclosed junction boxes ensure the camera withstands impact and protects its wiring. Gooseneck and pole mounts push the camera away from walls, keeping hands and tools out of reach.
Placement does the rest. Mounting cameras higher, typically ten to fifteen feet or more, discourages smash-and-grab attempts before they start. In high-risk areas like parking lots, condos, and construction sites, height turns vandalism from an easy target into a visible deterrent.
When durable mounting and smart elevation work together, the camera stops being something people try to break and becomes something they avoid.

Step #2: Mark and mount the bracket:
What to do:
Ensure the camera bracket is positioned accurately and securely before installation.
How to do it:
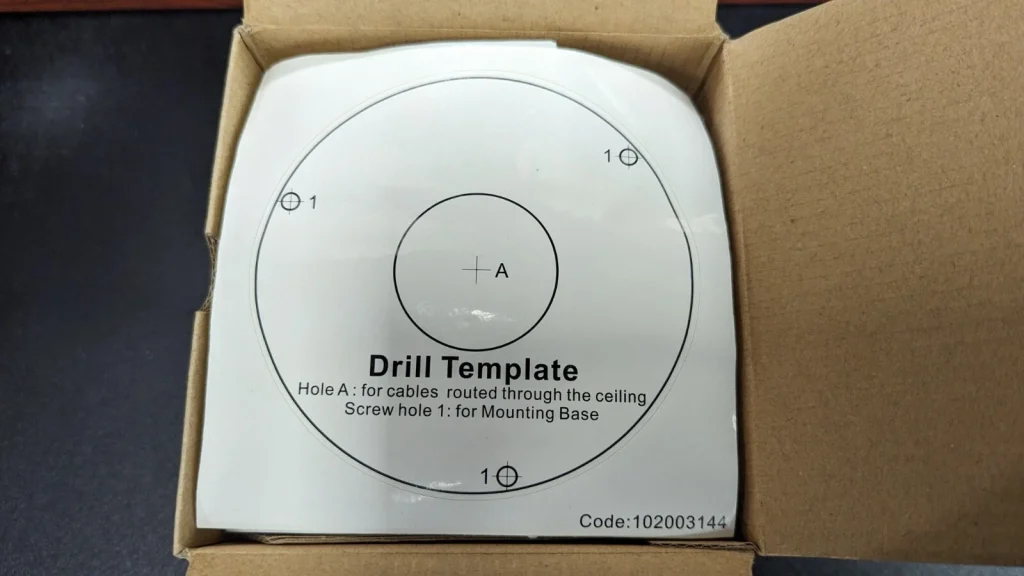
Use the included mounting template to mark exact drill points; rushing this step can lead to crooked footage or unstable cameras.
For drywall or brick, always use the correct anchors or toggle bolts to prevent the unit from sagging or falling.
Level the bracket with a bubble tool to avoid a tilted camera view, which can distort angles and miss critical details like faces or license plates. Taking a few extra minutes here saves you hours of frustrating readjustments later.
Pro tips for marking and mounting the bracket:
Dome cameras are typically heavier than bullet or turret styles, and they demand a flat, stable mounting surface, often ceiling-style, along with a flush fit for weather protection. Because of this, ensuring mounting stability and vibration resistance is critical.
Step #3: Drilling tips for Dome cameras:
Concrete or brick surfaces:
Mounting on more complex surfaces like concrete or brick requires more planning. Use a masonry drill bit and appropriate wall anchors to secure the base properly. Before drilling, map out your cable path, especially if you’re avoiding external conduits. Pre-planning helps maintain a clean install and protects cables from damage.
Drywall ceilings:
For drywall ceilings, drill just large enough to pass through the necessary connectors, such as an RJ45 Ethernet plug. Avoid oversized holes because they weaken the ceiling and increase the risk of tampering or dust entry. A snug cable pass-through keeps your installation secure and the ceiling surface intact.
Wall or ceiling mount:
When mounting a dome camera on a standard wall or ceiling, always drill a hole directly behind the camera base. This allows you to pass the cables through the wall or ceiling discreetly, keeping them hidden from view. A concealed cable run not only looks professional but also reduces the chance of tampering.
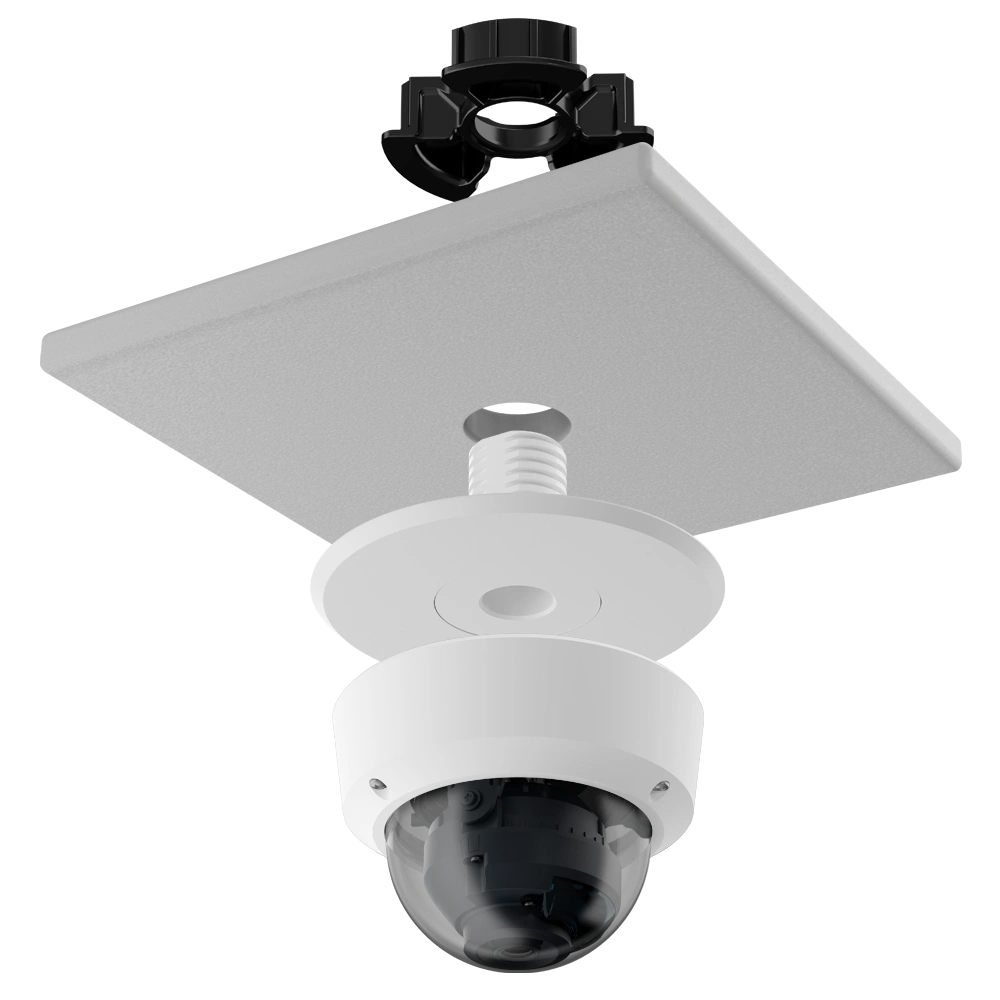
With advancements in technology, the CE-CTMP-5 offers an innovative, no-fuss solution for mounting indoor dome cameras on ceiling tiles. It’s a pre-cut, steel-reinforced ceiling tile mounting plate explicitly designed for drop ceilings, eliminating the need for makeshift fixes like toggle bolts or wood backing.
All you need to do is place the CE-CTMP-5 above the ceiling tile, align your dome camera to the pre-drilled center hole, and secure it using standard hardware: no drilling, no sagging, no hassle.
Pro tip: For PoE dome cameras (standard in IP systems):
One clean hole for the Ethernet cable is sufficient. Use a grommet to protect cable insulation.
Step # 4: Managing Dome camera wiring cleanly:
Proper cable management is essential for long-term reliability, weather resistance, and ease of maintenance. Dome cameras, especially when ceiling-mounted or exposed to the elements, require thoughtful handling of Ethernet or power cables. Here’s how to do it right:
1. Use raceways for surface-mount installs:
When running cables along walls or ceilings, especially in finished interiors or rental spaces where you can’t drill. Plastic raceways offer a sleek, non-invasive solution. They’re ideal for:
- Indoor ceiling or wall-mounted domes.
- Retrofitting without damaging drywall.
- Keeping long cable runs discreet.
Pro tip: Paint the raceway to match the surface and use corner fittings for clean turns.
2. Drop ceiling tricks for indoor Domes:
Drop ceilings provide a great hiding place for cables, but you’ll need to route smartly:
- Lay cables above the tiles, but don’t let them rest directly on them.
- Use J-hooks, cable trays, or support wires to stay compliant with code and maintain accessibility.
- Create a cutout in a tile to flush-mount the dome and feed the cable cleanly.
This setup keeps cables out of sight and reduces visible clutter in commercial or office installs.
3. Junction Boxes: Small Accessory, Big Impact:
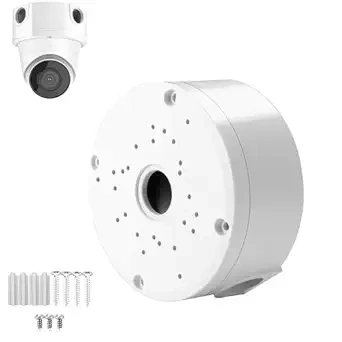
For outdoor or exposed installations, junction boxes are a must. They:
- Protect RJ45 connectors from water and corrosion.
- Give you space to hide the excess cable.
- Provide a clean, uniform mounting surface, especially on uneven or concrete walls.
Most dome camera junction boxes are designed to match the shape and size of the camera base, giving a clean, factory-finished look.
Pro tip about common cable management mistakes to avoid:
- Letting cables dangle or twist in exposed areas (easy damage point).
- Forcing cables through tight or sharp bends.
- Leaving connections exposed to UV, water, or bugs.
- Using zip ties that are overtightened and pinch the cable.
Step #5: Add strength and reliability to your installation:
Dome cameras are heavy, and when you’re mounting them to materials like ceiling tiles, drywall, or aluminum soffits, you need to reinforce the surface to avoid sagging, cracks, or long-term failure. Here’s how you can be sure your camera doesn’t fall off:
1. Use toggle bolts for drywall or hollow ceilings:
Toggle bolts expand behind the surface, creating a firm grip inside hollow areas. This is especially useful when there’s no stud or joist to screw into.
Tip: Choose bolts rated for at least twice the camera’s weight, especially for larger dome models.
2. Add furring strips behind thin surfaces:
If you’re mounting to aluminum soffits then adding a furring strip or piece of plywood behind the surface provides a solid anchor.
It also:
- Spreads the weight of the camera.
- Prevents screws from pulling through soft material.
- Reduces vibration or flexing that can affect video quality.
3. Use large washers to distribute pressure:
Even if you’re using self-tapping screws, wide washers help spread the load, especially on brittle materials like ceiling tiles or thin aluminum. This prevents cracking or deformation over time.
Pro Tip: Combine washers with furring strips for maximum support. The washer keeps the camera mount secure, and the backing adds rigidity.
Failing to reinforce your mounting surface can lead to:
- Wobbling cameras (which affects video).
- Structural failure after temperature changes or storms.
- Damage to drywall or soffits over time.
Step #6: Pro-level finishing touches to your Dome camera:
Once your dome cameras are installed, it’s time to lock down the system like a pro. Start by securing the network. Ensure firmware is up to date, enable VPN access, and configure port security to block unwanted access.
Next, fine-tune your settings: define motion zones, set intelligent alerts, and enable privacy masking where needed. Finally, integrate your cameras with alarms, access control, or a remote monitoring service for a fully connected, responsive security solution. These final steps turn a basic install into a professional-grade surveillance system.
5 Common Dome camera installation mistakes according to security experts:
Mounting too high:
Chris Owen, Professional CCTV installer, says:
“Twelve feet above the finished floor is the sweet spot. Any lower, and tampering becomes easier. Any higher, and you lose crucial detail. I work with this every day.”
Using the wrong mounting surface:
Amos Technology R&D director says:
“Cameras must be firmly fixed to avoid shaky footage. For walls, use expansion plugs and screws; for ceilings, consider adding a wooden support block behind the mounting area.”
Underestimating camera angles:
An IT professional passionate about testing electronics says:
“Camera angles matter. A 2.8mm lens captures wide, close-range views perfect for doorways while a 12mm lens zooms in from afar. I find the 4mm lens ideal, covering about 70 degrees, matching most infrared output. Always step outside, stand where the camera will go, and take a photo with your phone to set realistic expectations.”
Skipping proper cable management:
Carson Miller says
“Poor wiring leads to service calls. Neat, protected cables last longer and reduce tampering risk. Dome cameras are ideal for soffit mounting because they offer wide-angle coverage while staying discreet. Positioned correctly , most dome lenses cover less than 90 degrees, so placement at the corners of your home helps maximize visibility with fewer cameras.”
Failing to secure the network:
Simon de Massia System administrator at Sirix says
“A secure camera with an insecure network is a false sense of safety. Non-physical security measures such as firmware and VPNs aren’t optional; they’re essential.”
Can you install a dome camera without drilling?
Several experts offer creative solutions for installing security cameras without drilling. Chieftain Logistician recommends strong adhesives or suction cups, with a foam barrier to catch the camera if the adhesive fails. Joseph Newcomer suggests using glue, double-sided tape, or Velcro and encourages a visit to the hardware store for alternative mounting supplies.
Neil Williams suggests using wireless cameras and surface-mounted cables secured in low-access areas, stressing the importance of strong encryption. Finally, Richard Johnson keeps it simple by placing wireless cameras on shelves indoors and relying on a Ring doorbell for outdoor surveillance.
Good read:
When should I call a professional installer for a Dome camera?
Suppose you’re dealing with a complex multi-camera setup, high ceilings, rough or uneven surfaces, or need advanced features like AI integration and 24/7 remote monitoring. In that case, it’s time to call a professional. These scenarios often require specialized tools, precise configuration, and expert planning to ensure your dome cameras work reliably and cover every critical angle without compromise.
Where should you not install a dome camera?
Direct sun paths, headlights, or reflective glass:
Glare and backlighting can overwhelm wide dynamic range performance, reducing image quality below usable levels and resulting in silhouettes rather than identifiable faces or license plates at distances of 20–50 meters. Infrared reflection from glass can increase AI false negatives by 40–60%, silently degrading detection performance.
Low mounting heights below 7 feet:
Cameras installed under 7 feet are easily spray painted, smashed, or cable cut. Even IK10 domes can be disabled before alerts trigger, with documented disablement rates approaching 90 percent in uncontrolled access areas.
Vibrating or unstable structures:
Mounting on HVAC units, vents, flexible poles, or trees introduces motion blur and frame instability, often dropping effective frame rates below 30 fps and triggering persistent false motion events.
Excessive height above 15 feet:
Installations higher than 15 feet create steep top down angles that cause facial foreshortening and reduce recognition accuracy to below 70 percent at common tilt angles around 45 degrees.
Overreach into neighboring or private areas:
Capturing adjacent properties or sensitive spaces introduces regulatory exposure under frameworks like GDPR, PIPEDA, or HIPAA, risking legal challenges and footage being ruled inadmissible.
Heat sources exceeding safe operating ranges:
Placement near exhaust vents or heat generating equipment can push sensors beyond 60°C, accelerating failure, corrupting PoE streams, and increasing dropped frames in cloud video systems.
How to make your Dome cameras even more powerful?

Installing dome cameras is just the beginning. To make your system more innovative and more reliable, integrate it with Remote Video Monitoring.
A layer of AI-powered video analytics on top of your footage, helping you spot suspicious behavior, track activity across zones, and reduce false alerts. This means faster responses, clearer insights, and less downtime.
So whether you’re securing a jobsite, a condo, or a retail floor, combining your dome cameras with real-time monitoring and advanced analytics keeps your system sharp, proactive, and always one step ahead.
With 24/7 automated camera health checks, AktivSense alerts you the moment something’s wrong. Whether it’s a disconnected camera, blurry footage, or a blocked view, it’s like having a technician on standby, watching over your system, so you’re never caught off guard by a camera that quietly stops working.
Frequently asked questions:
How to mount a dome camera?
Use the included mounting template to mark the drill holes. Drill into the surface (ceiling or wall), insert the proper anchors, then screw in the camera bracket. Align the dome level using a bubble level before securing the camera and connecting the cables.
What is the angle of view of a dome camera?
Most standard dome cameras offer a field of view between 70° and 120°, depending on the lens type. Wide-angle or fisheye dome cameras can provide up to 180° or 360° coverage when ceiling-mounted.
How to improve the camera angle?
Adjust the tilt, pan, and rotation of the camera after installation to focus on key areas. Use a live feed from the camera to fine-tune the angle, making sure essential zones (like entrances or cash registers) are fully visible without obstructions or glare.
How to focus a dome camera?
If it’s a manual focus camera, remove the dome cover and rotate the lens ring until the image is sharp. You can check using a monitor. For auto-focus or varifocal cameras, use the camera software or control panel to adjust focus and zoom digitally.
How to place dome cameras to maximize coverage?
Choose a fixed or wide-angle lens (2.8 mm–3.6 mm), which gives you a broader horizontal field of view, ideal for capturing full rooms from a single mounting point.
4MP or higher resolution:
To make the wide-angle footage sharper, pair that with a resolution of at least 2MP (ideally 4MP–5MP), and you’ll get the image clarity needed to identify people.
Conclusion:
Installing a dome camera isn’t just about getting it on the wall; it’s about doing it right the first time. From choosing the right lens and mount type to securing your wiring and reinforcing weak surfaces, every detail matters.
A bright and clean installation means sharper footage, fewer blind spots, and less maintenance down the line.
For even greater performance, pair your cameras with remote monitoring and automated health checks to stay ahead of failures and stay protected 24/7.
Ready to install like a pro? Contact us today for a customized security solution for your business.